
| Summary: | Can the layouts of the search fields be changed? |
| Article Type: | FAQ |
| Related Product(s): |
|
Quick Answer
Yes, the layouts of the search fields for both General Searches and Inline Searches can be changed through the Solution Manager. They can be arranged in up to 3 columns and 15 rows per group. It is also possible to add or remove groups for the search fields, and to automatically expand or collapse these groups when the parent form loads.
How to Change the Search Field Layout
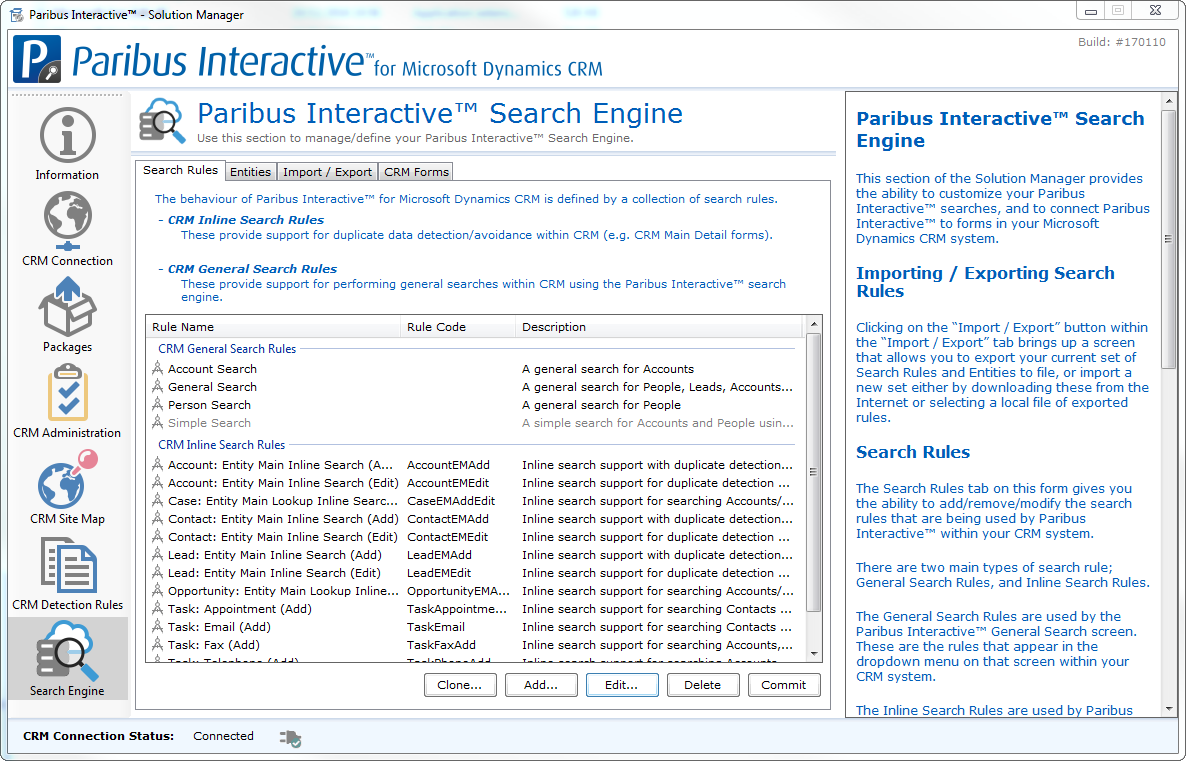
As alluded to above, the changes can be made through the solution manager. If you need to download the solution manager, head here to get the latest version. As normal, once you’re in the solution manager connect to your CRM instance. If you need guidance to do this, use this article to step you through the process. Now navigate to the Search Engine tab on the left hand side and select the search you would like to edit – for this article, I’ll use the General Search – and press the edit button at the bottom of your screen.
Within the Paribus Search Rule Editor, navigate to the Paribus Search Fields tab.
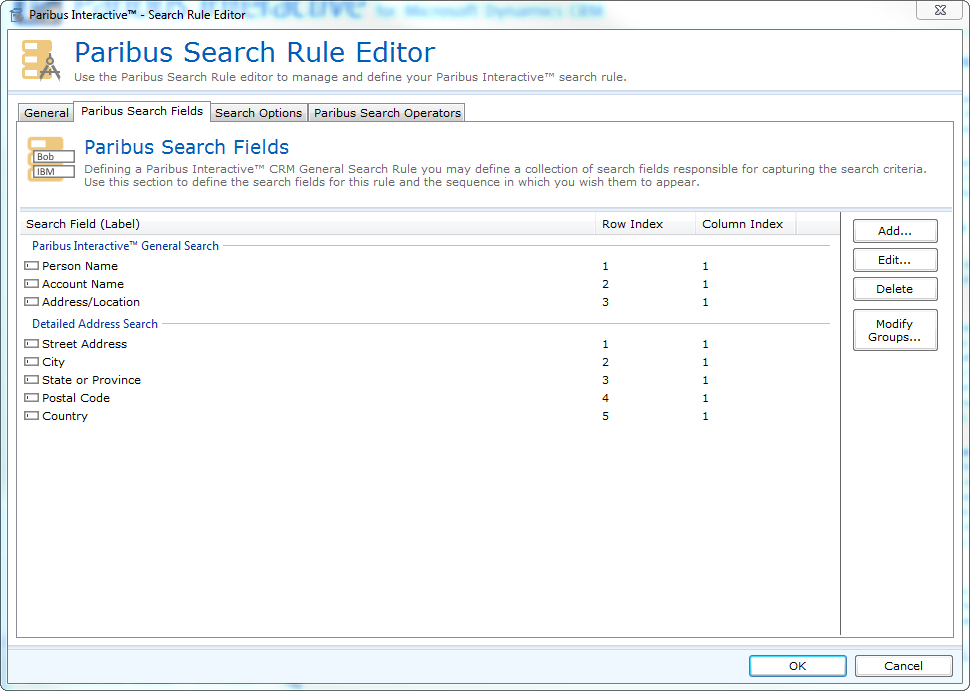
Here you can see we have two groups of fields, the first group labelled “Paribus Interactive General Search” and the second labelled “Detailed Address Search”. We can now change the layout in a few different ways:
- Edit: Select the Search Field you would like to edit and click edit.
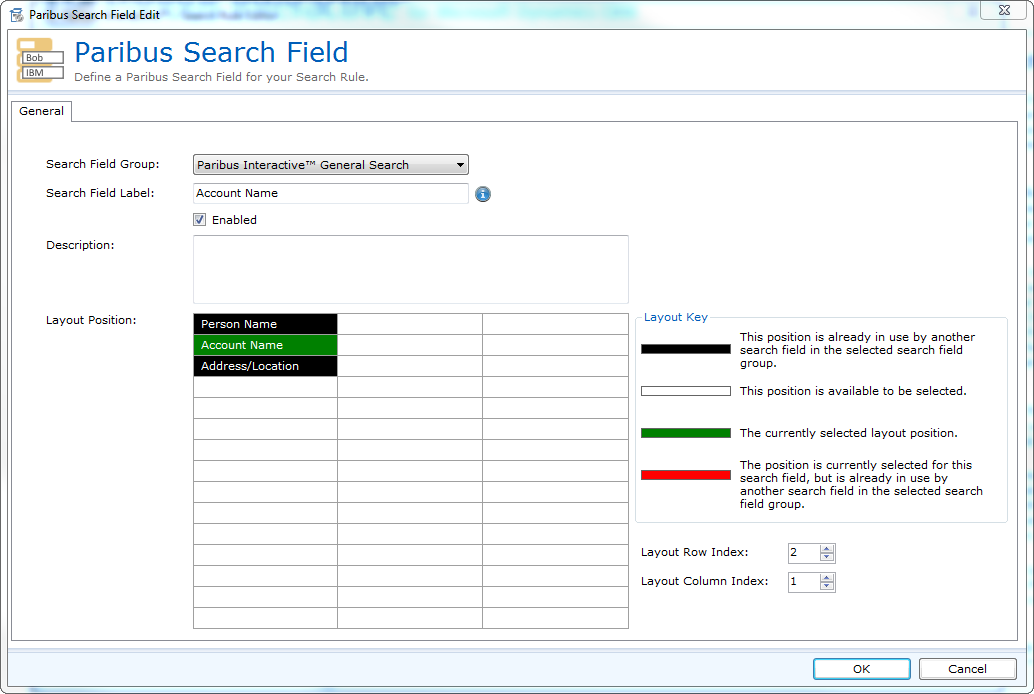
Figure 3 – Reordering the search field within a group - From here you can:
- Move the position of the Field. This will move the green bar to a different position in the grid. NOTE: Row 1 is the top row.
- You can also move the Search Field into a different group by changing the Search Field Group.
- Disable the search field. By doing this you are hiding the Search Field visually as well as stopping any searches using the data that was collected by this Field. If this will affect any searches you will see a warning dialog pop up.
-

Figure 4 – Warning: Disabling a used search field - Finally, you can rename the Search Field, this is purely a cosmetic thing and will not influence any searches.
- From here you can:
- Delete: Select the Search field you would like to remove and click delete.
- Before you can delete any Search Field you must first remove any reference to the Search field from any Search operator. If you don’t, a warning box will pop up telling you which Operators are currently using the search field and stop you deleting the Search Field.
-
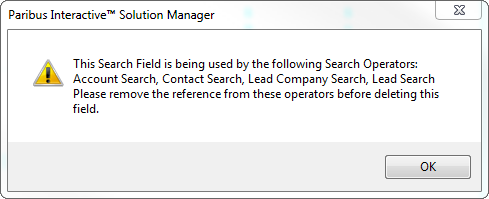
Figure 5 – Warning: Deleting a used search field
- Modify Groups
- Groups are a cosmetic way of grouping and labelling similar search fields.
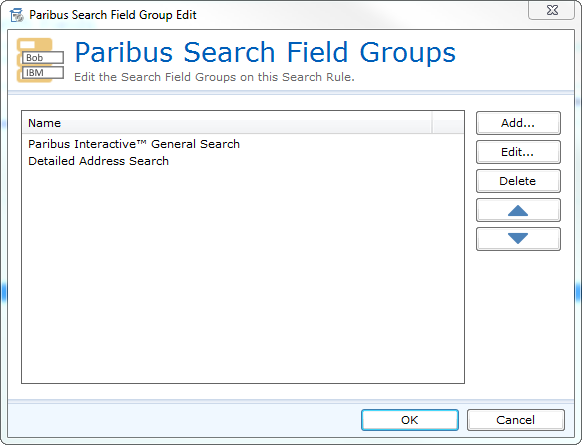
Figure 6 – Search Groups - From here you can:
- Add new groups.
- Edit existing groups by selecting the group and clicking edit. Here allows you to:
- Rename the group
- Disable the group. This hides the group from the CRM form when using Paribus Interactive, however the search fields are still enabled within it. This means that whilst you cannot see or use the search fields they are still functional in the background.
- Automatically expand group. This option allows you to collapse the group when you see it in CRM. This has no effect on any searches or your ability to use any of the search fields, it simply minimises the group. To access them, you must click on the group label in CRM.
- Change the order of the groups. This is done by selecting the group you want to move and using the up and down arrows.
- Finally, you can rename the Group, this is purely a cosmetic thing and will not influence any searches.
- Groups are a cosmetic way of grouping and labelling similar search fields.
- Once you have made the changes, return to the Solution Manager and commit your changes.

Figure 7 – Changes need committing
| Related Resources: |
|
| Further Information: |