| Summary: | This articles explains how you can set up a Custom Field as a filter. |
| Article Type: | How-To Guide, Technical Article |
| Related Product(s): | This article relates to the following products:
|
Custom fields – Adding as a filter
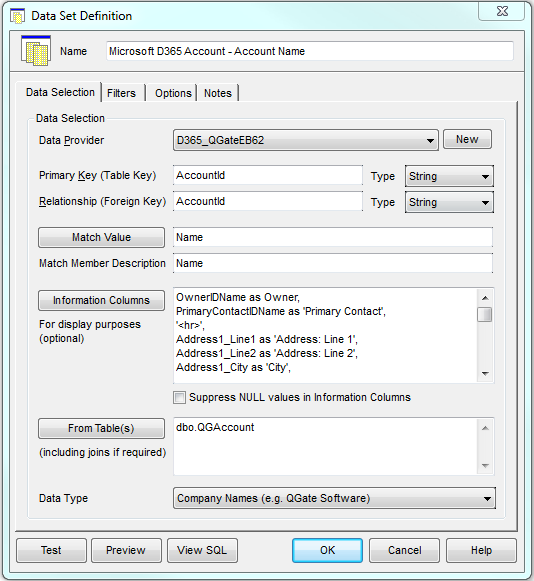
Navigate to “Data Sets” area in “Data Layer”. Right click on the data set of the relevant match set eg. Account Name and select “Edit Data Set”.
Select the “Filter” tab.
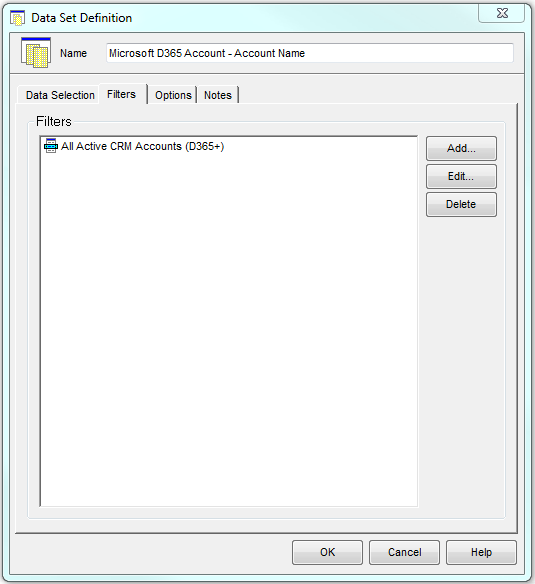
Click on “Add” button.
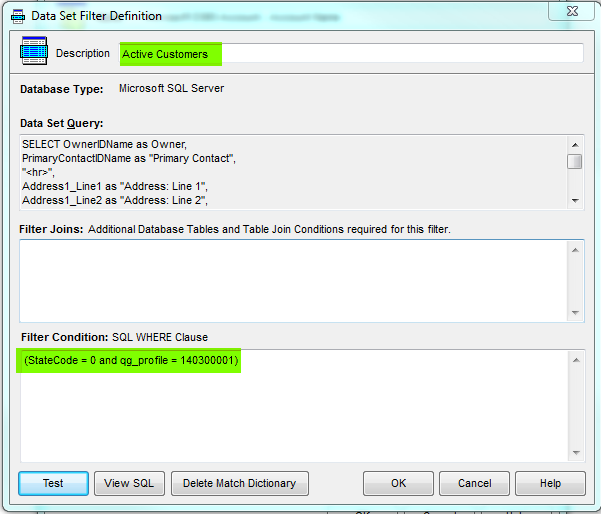
Give the Filter a name and add the syntax for the where clause.
Click on “OK” to confirm.
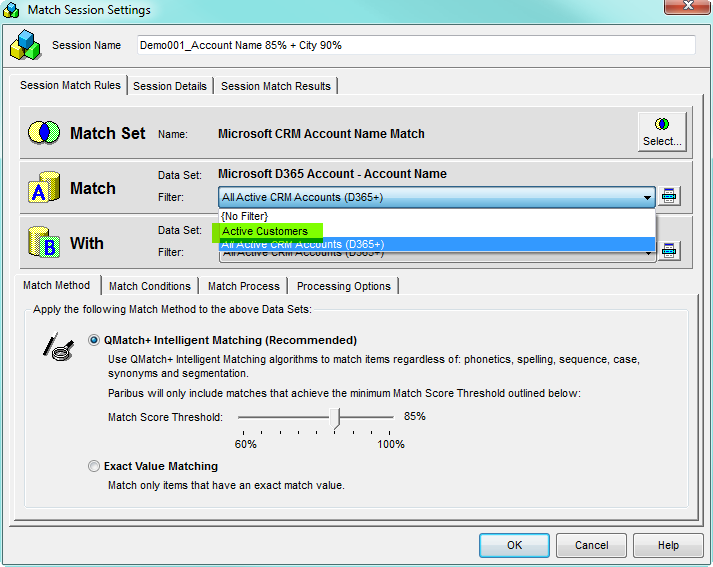
Click on “OK” to close the Data Set.
The filter will now be available for a Match Session selection as shown in screenshot below:
| Related Resources: | |
| Further Information: |